Nobody likes the long and complicated process of filling out forms, especially when signing up for a website. You’ve probably experienced the frustration yourself. According to Blue Research a whopping four out of five people (86%) are annoyed by the need to create new accounts just to register.
It gets even worse! Did you know nine out of ten people (90%) have abandoned a website entirely because they forgot their password or login information? Forget answering security questions or resetting passwords – they just leave!
This can have a major impact on your website. Difficulty signing up or logging in means fewer users and potentially lost sales.
However, there is a solution: integrating Facebook Login.
In this article I will show you how to easily implement facebook login feature on your WordPress website.
Why You Should Consider Adding Facebook Login to Your WordPress Website
You may be wondering why you should integrate Facebook into your wordpress site if you already have a login option. The main reason is to make it more convenient for your users.
With almost 2.8 billion active users every month, most of your website visitors probably have Facebook accounts. Considering how many usernames and passwords people have to remember nowadays, being able to register using their existing Facebook account is incredibly convenient.
The Facebook login feature allows users of your website to easily create accounts with just a single click.
Benefits for Your Business :
- Streamline registration and login process for users.
- Increase signups and user engagement on your website.
- Gain access to basic user information for targeted marketing.
- Potentially boost content reach through social media sharing.
- Improve user experience and reduce login abandonment.
As so many people use Facebook, integrating your business with it can give you access to important information about your customers and their behaviours. This data can be extremely helpful in expanding your business.
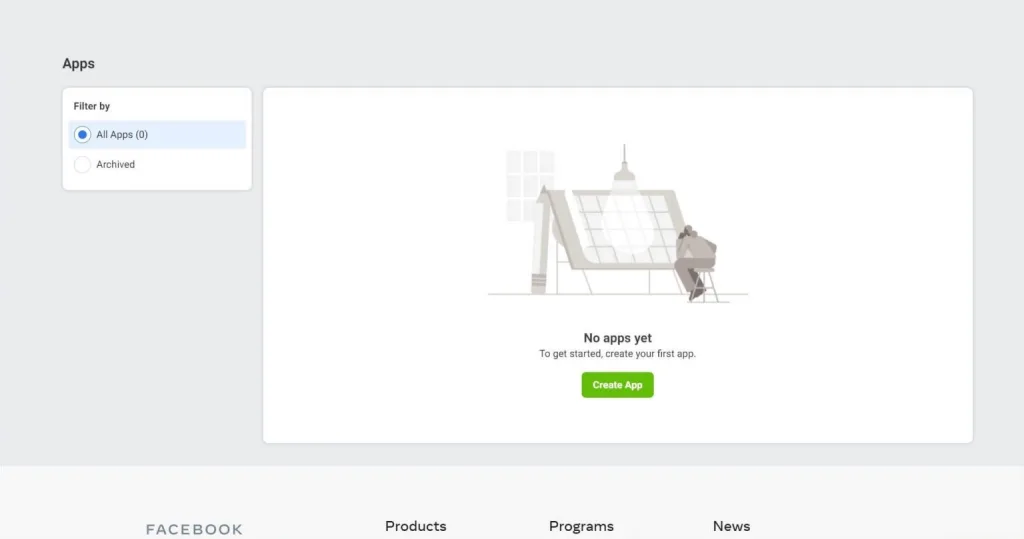
How to Add Facebook Login on WordPress Website (5 Steps)
Ready to add social login on your website? Here’s a step-by-step guide for adding Facebook Login.
Step 1 : Create a Facebook Developer Account
To start, you will need to create a Facebook Developer account. This will allow you to use the Facebook Software Development Kit (SDK) to make different apps and connections, like a login button for your website.
Go to the Facebook Developer website and click on the “Get Started” button in the top right corner. They will ask you a few questions, but if you already have a Facebook account, it won’t take long. Once you are done, you will be taken to the Facebook Apps page, which is the next step.
Step 2 : Create a New Facebook App
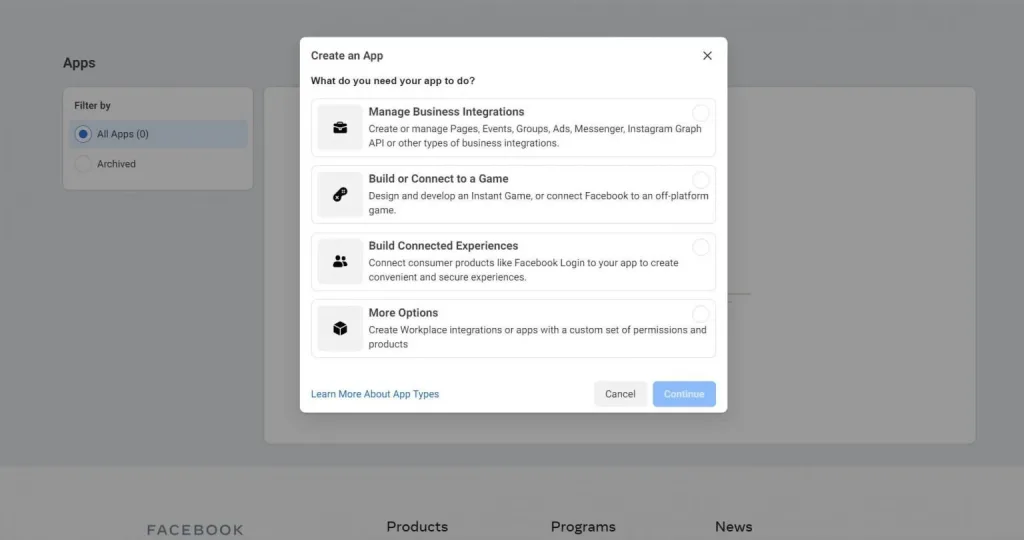
To begin, you will need to make a Facebook app. This app will contain the code for your integration. On the main Apps page, click on the green button that says “Create App” to start the process of creating a new Facebook app.
This will open a window where you can choose what you want your app to do. Select “Build Connected Experiences” to set up Facebook Login.
Then, you will need to give your app a name and provide a contact email.
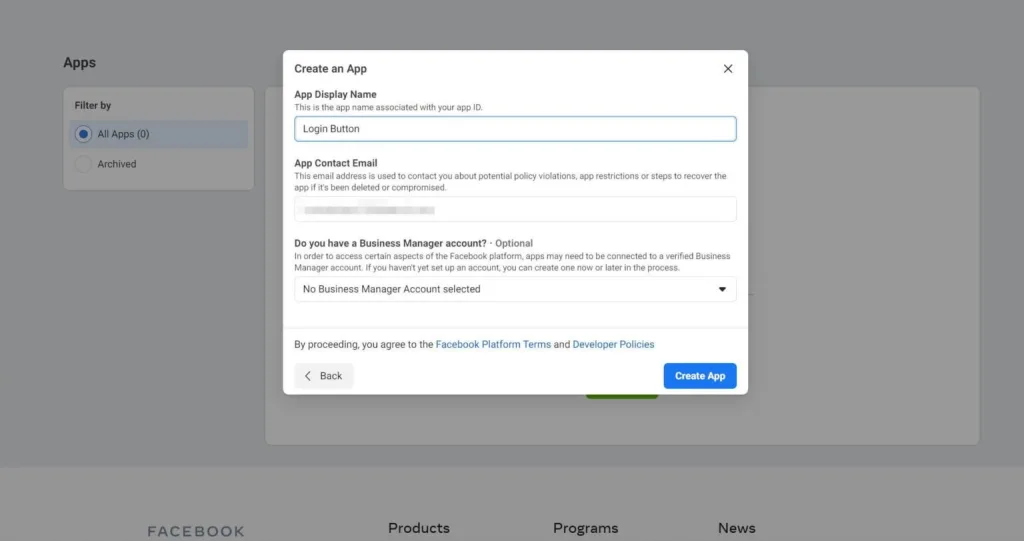
Once you have filled in this information, click on “Create App.” You will be asked to confirm that you are a real person by completing a CAPTCHA, and then you can move on to the next step.
Step 3: Configure Facebook Login
Afterward, you will need to select a product for your new app. This is essentially a ready-made piece of code that will help you get started in the right direction. If you picked “Build Connected Experiences” in Step 2, you should see an option on this page for Facebook Login:
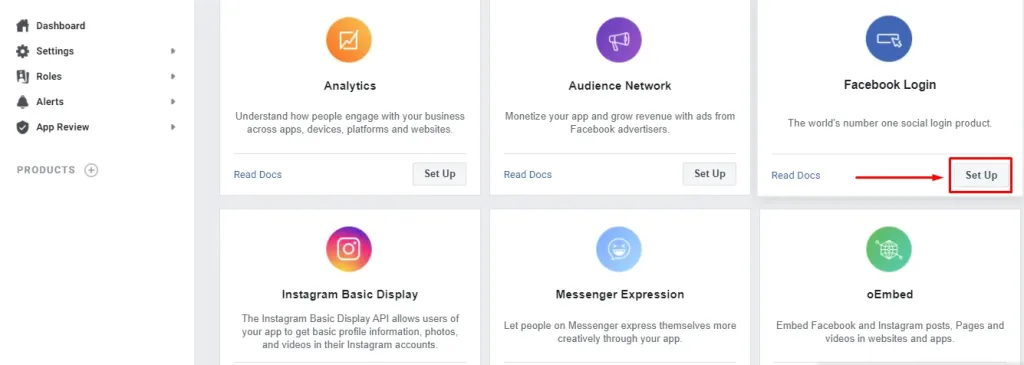
Choosing a product for your Facebook app. Simply hover over it and click on “Set Up“. Facebook will then ask you to choose a platform for the app:
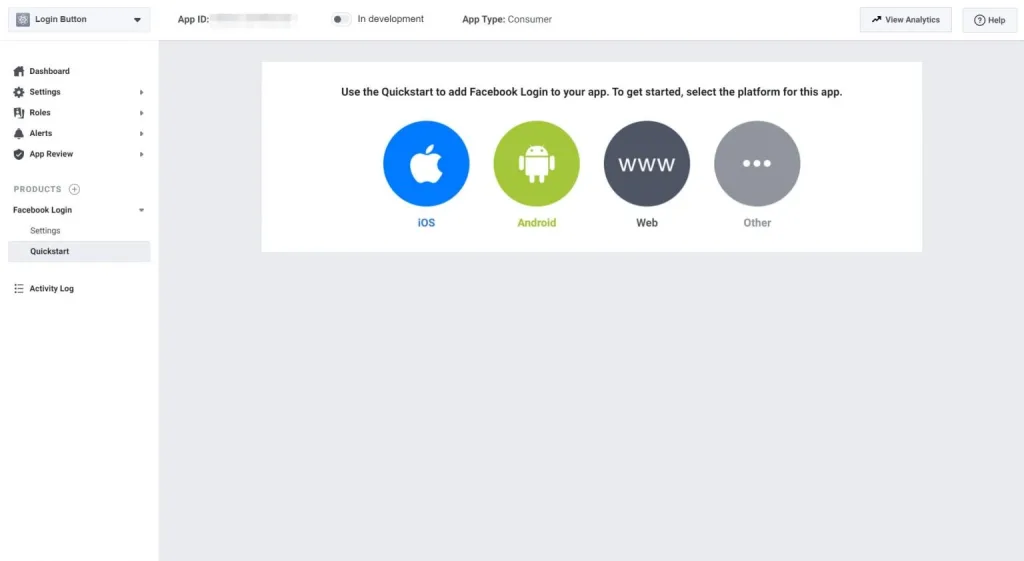
Since this is for your website, choose “Web”. On the next screen, you will be provided with a step-by-step guide, starting with providing your website’s URL:
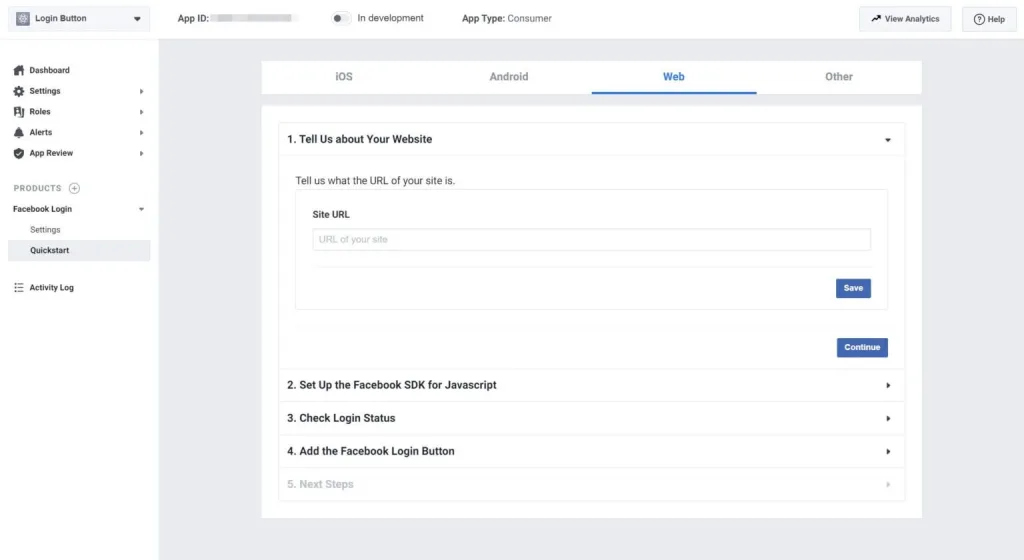
Some of the steps will require you to copy and paste code into different parts of your website to enable analytics and add the “Connect with Facebook” button. Although you can do this manually and it will work just fine, but we will be using a WordPress plugin to simplify the process(In step 5) . If you prefer, you can skip through these steps.
Step 4 : Configure Your Facebook Login Button
Once you reach Step 4 in the process of adding your product, Facebook will provide you with the code for the login button. At this point, you can customize how it looks.
Facebook has a helpful code generator that allows you to easily set up the appearance of your login button:
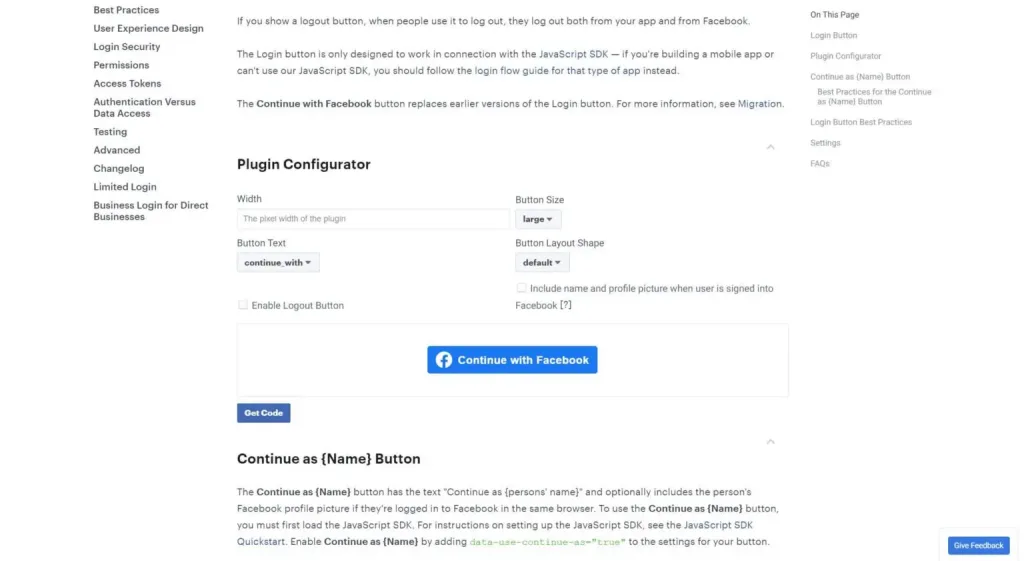
The configuration editor for the Facebook login button’s looks. You can then simply copy and paste the generated code onto the appropriate page of your website. We will be using a plugin to do this instead of manually integrating the Facebook login button, but the customization options can still be useful.
Step 5: Display the Login Button on Your Website
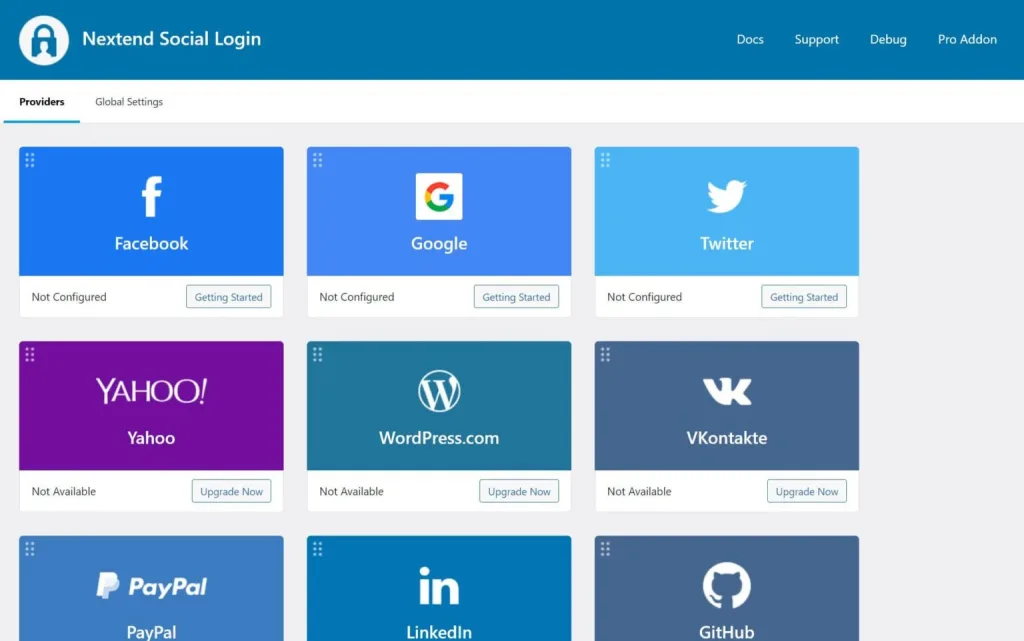
Now, you’re ready to display your Facebook login button on your WordPress website. Nextend Social Login plugin is a great option that also supports Google and Twitter.
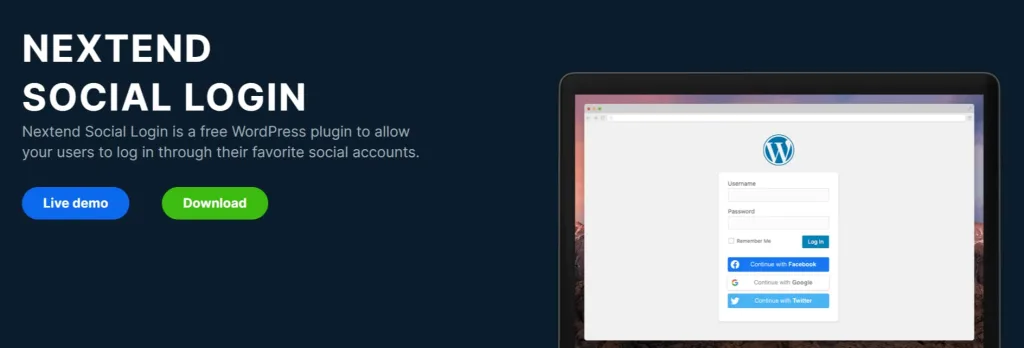
To add this plugin, go to your WordPress dashboard and click on “Plugins” then “Add New“. Look for the plugin called “Nextend” and install it. Remember to activate it too. After that, go to “Settings” and click on “Nextend Social Login“
Select “Getting Started” under the Facebook option in order to set up the plugin. You will see a list of instructions for creating a Facebook app. Since we have already completed this step, you can scroll down and click on the button that says “I am done setting up my Facebook App.” After that, a screen with settings will appear.
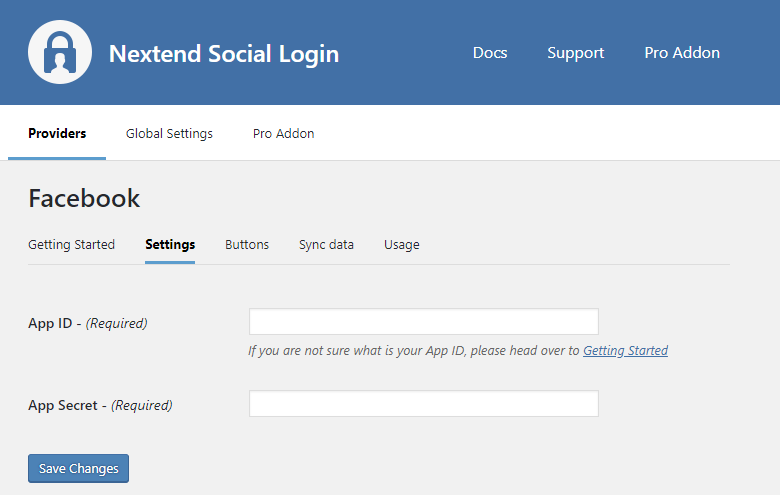
You will have to provide your App ID and App Secret. These can be located in your Facebook Developer account. Just go to the top and click on “My Apps“, then choose the app you made earlier. On the left side, click on “Settings” and then “Basic“.
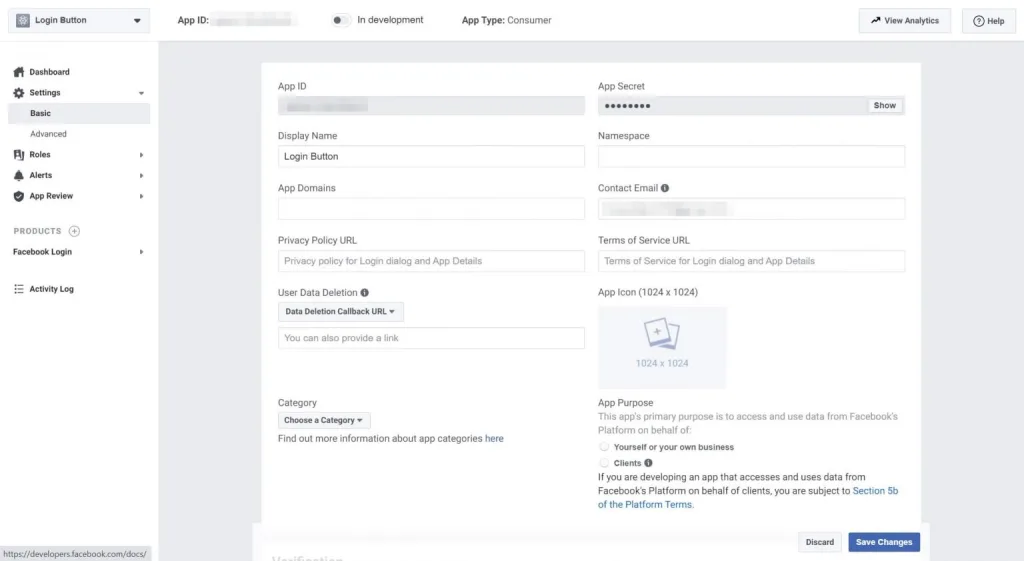
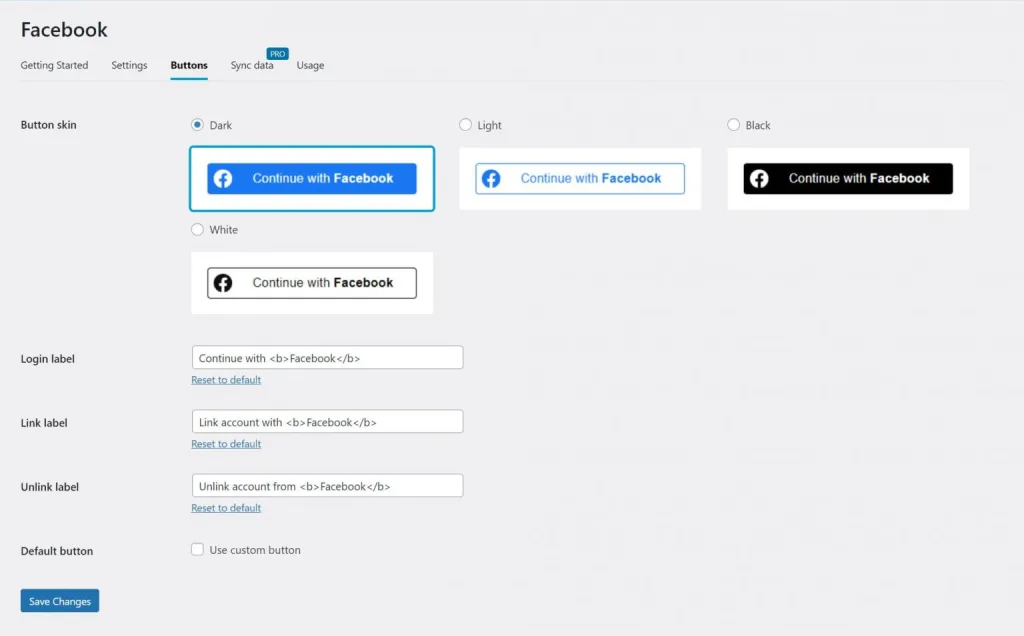
The App ID and Secret code for your app can be found at the top of the screen. Enter these details in the Nextend settings. You have the option to change how your button looks by selecting from a variety of pre-designed styles provided by Nextend. Alternatively, you can use your own custom button that you made in Step 4.
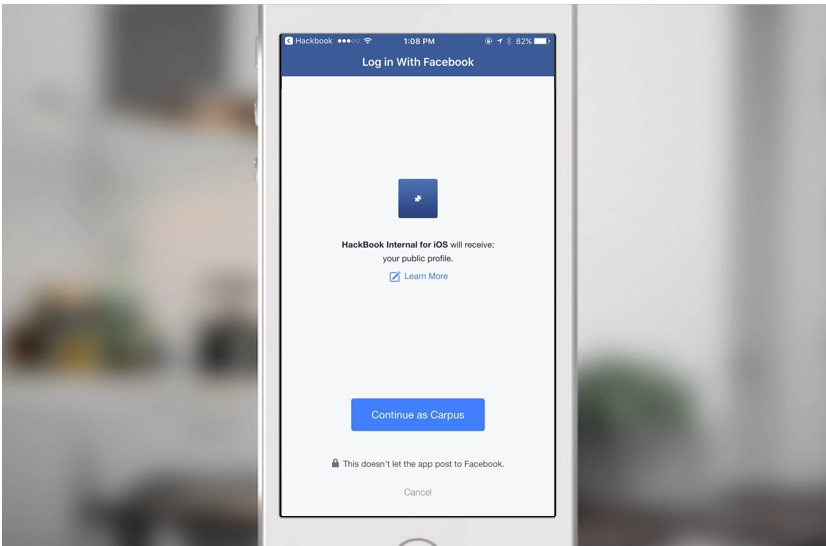
After completing these steps and saving your changes, the login page will show a button that says “Continue with Facebook” (or any other text you have set in the settings).