In today’s fast-paced world, website visitors value convenience. Rather than juggling multiple passwords, they prefer using a single set of existing login credentials to access multiple websites or services. The most reliable and effective solution for this is one-click Google login.
By letting users sign in to your website with their existing Google accounts, you can make the registration process smoother and less complicated.
Research has shown that 56% of people say they have stopped using an online service because they found the login process too frustrating to finish.
In this guide, we will show you two different ways to add one-click Google login to your WordPress website.
2 Easy Ways to Add One-Click Google Login to Your WordPress Site
There are several plugins available for adding one-click Google login to your WordPress site. In this article, we will discuss the two best options. You can choose any of them.
How to Add Google One Click Login with Nextend Social Login
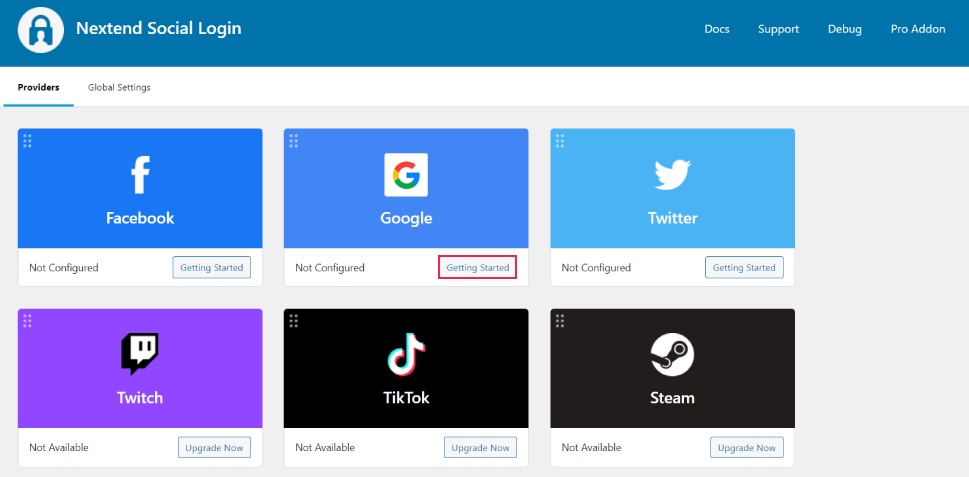
Nextend Social Login and Register is a freemium plugin that lets you add login options for Google, Facebook, and Twitter for free. If you upgrade to the premium version, you can also include PayPal, TikTok, Slack, and other logins.
First, you need to install, and activate the free Nextend plugin.
[For more information, check out this beginner’s guide on how to install a WordPress plugin.]
After the installation is complete, go to Settings > Nextend Social Login in the WordPress admin dashboard. Here, you will see the option to set up Google login.
![]() Getting Started with Google Login
Getting Started with Google Login
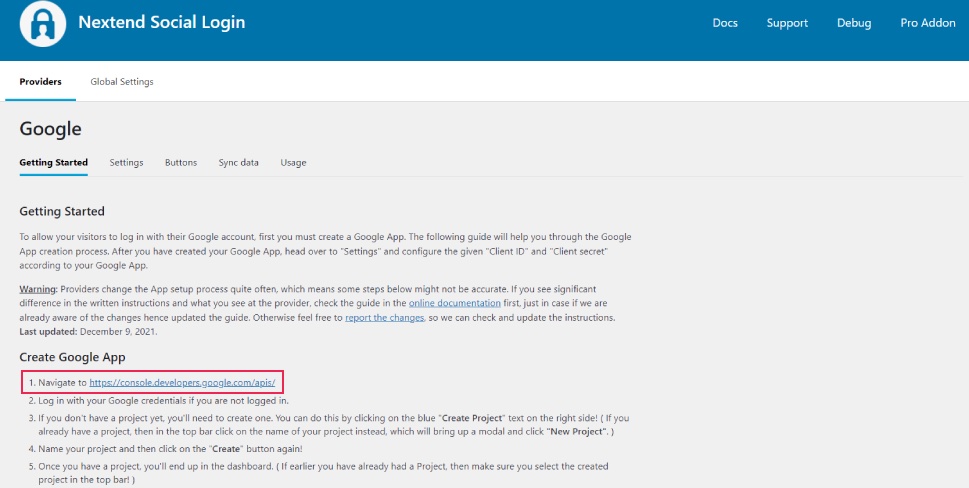
Click on “Getting Started,” and a new page will open, asking you to create a Google app.
It sounds complicated, but don’t worry—it’s pretty straightforward, and we’ll help you through it.
![]() Creating a Google App
Creating a Google App
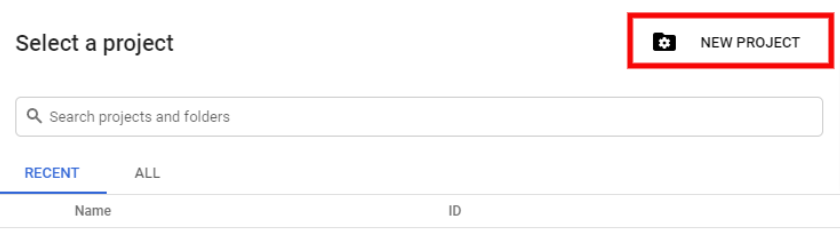
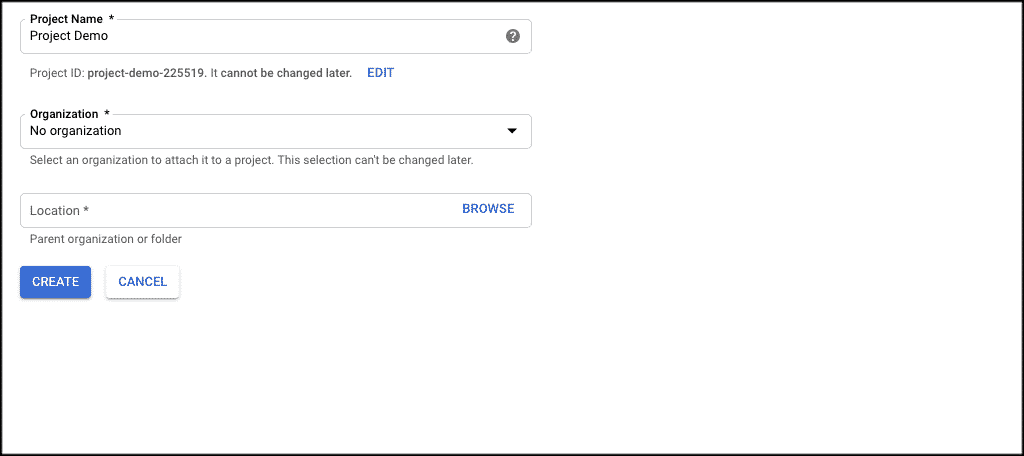
Now, head over to the Google Cloud Console, specifically the APIs & Services page. Click on “Create Project.“
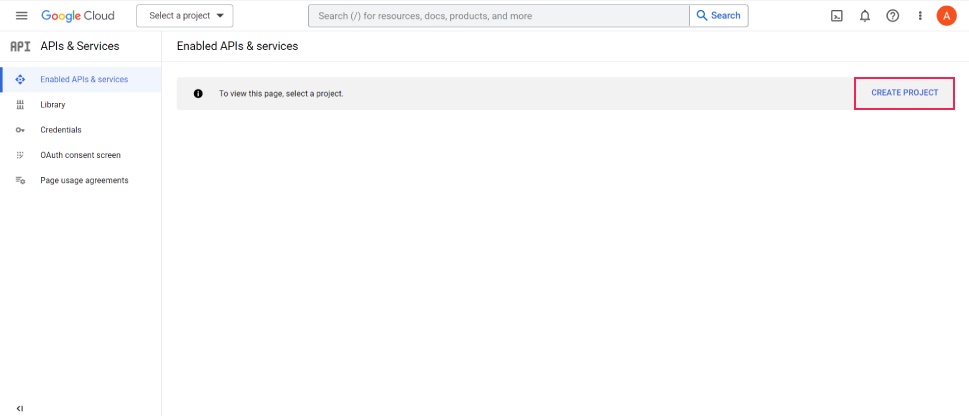
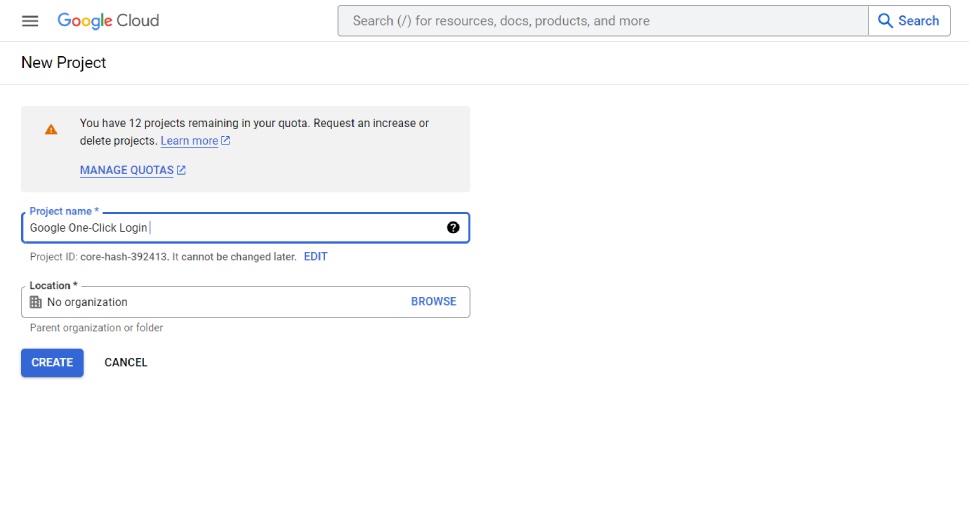
Here, you can give your project any name you want and select an organization if you have one linked through Google Workspace. When you finish naming it, click “Create.”
![]() Setting Up the OAuth Consent Screen
Setting Up the OAuth Consent Screen
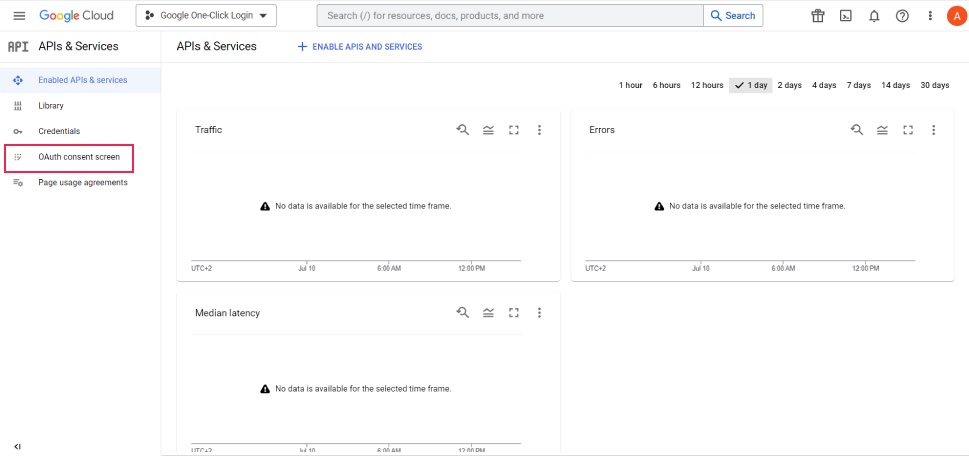
On the next screen, click on “OAuth consent screen.”
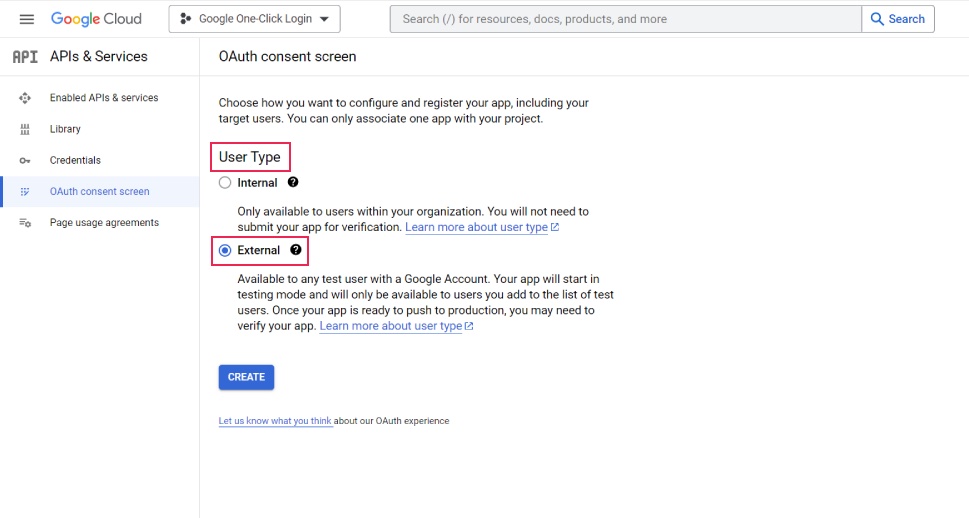
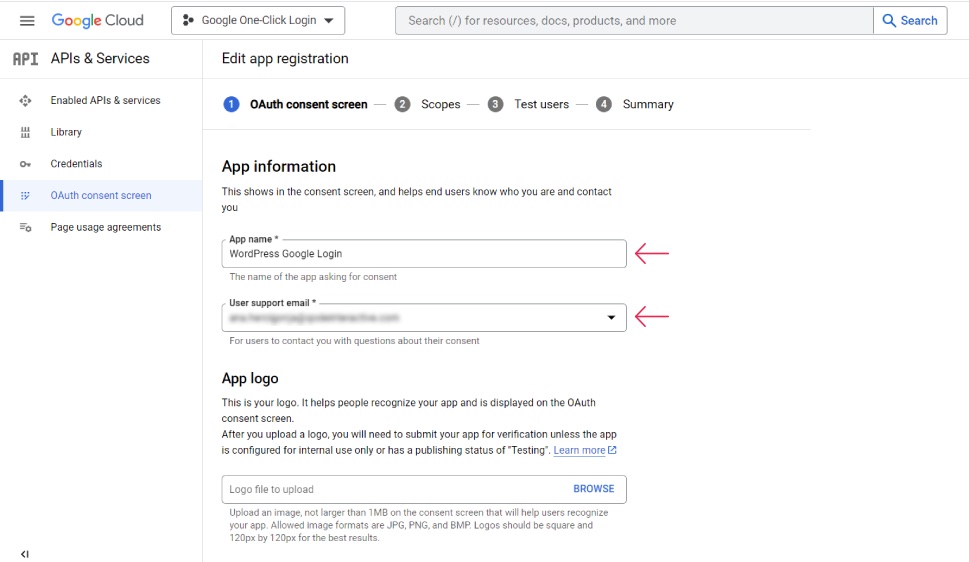
Now, you’ll set the user type for your app. You have two options: internal and external. The internal option only allows people within your organization to log in, while the external option lets anyone with a Google account log in. Choose the external option.
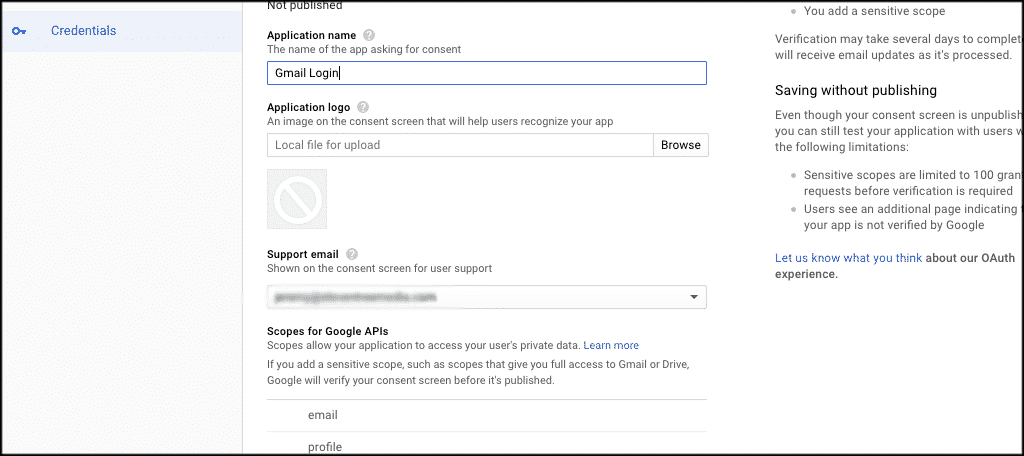
Next, fill in some basic information. Start by naming your app (any name you like) and entering your email. You can also upload a logo so users can easily recognize your app.
Just remember, if you upload a logo, it might take a long time for Google to verify it—up to several weeks.
On the next page, you’ll need to enter your domain name and the link to your privacy policy.
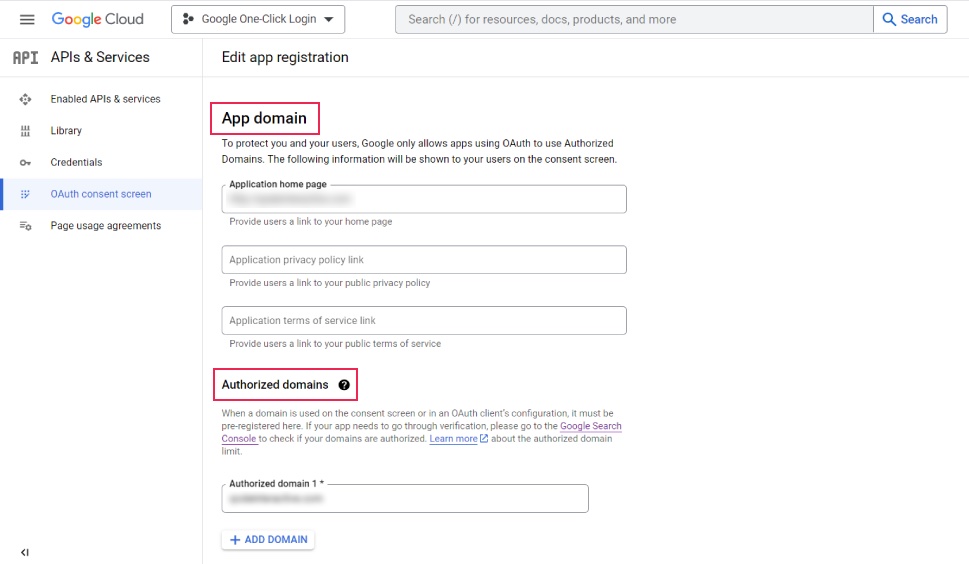
![]() Domain Name Requirements
Domain Name Requirements
To create an app for a website, you need to have a registered domain name, which may also need to be verified with Google Search Console. To add your domain, click on “Add Domain.“
Finally, enter your email and click “Save and Continue.“
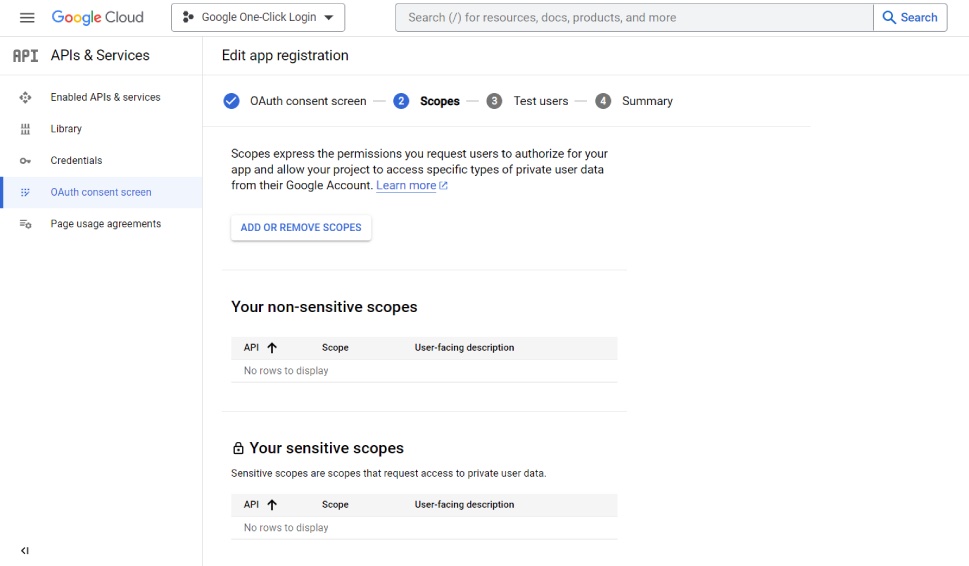
The next page will let you set the app’s scopes.
![]() Editing App Registration
Editing App Registration
You don’t need to change anything here, so just scroll down and click “Save and Continue.” The same goes for the next page about Test users.
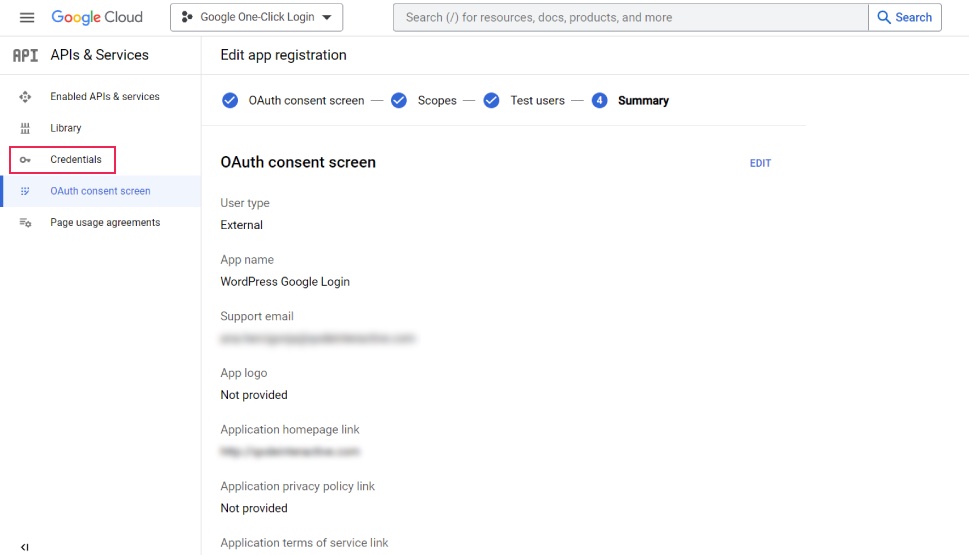
The last page summarizes what you’ve entered—app name, type, domain, associated email, etc.
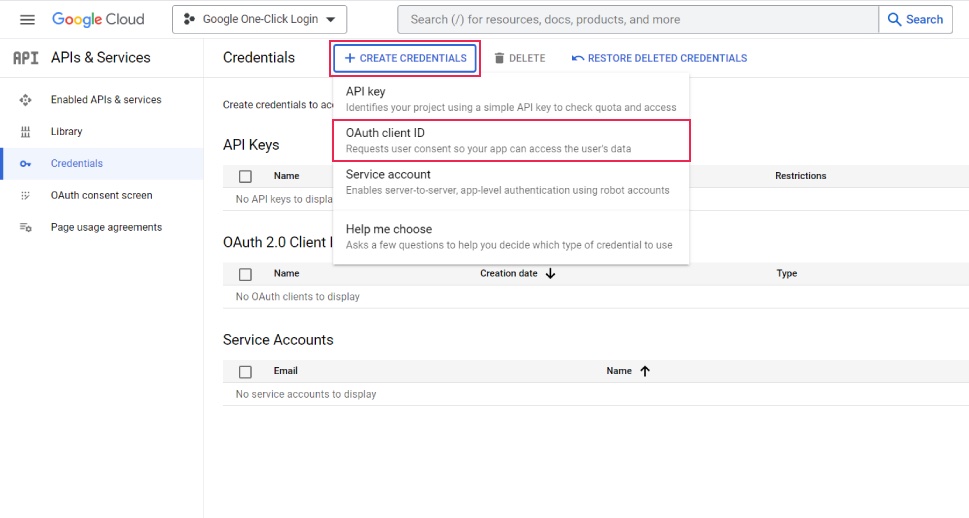
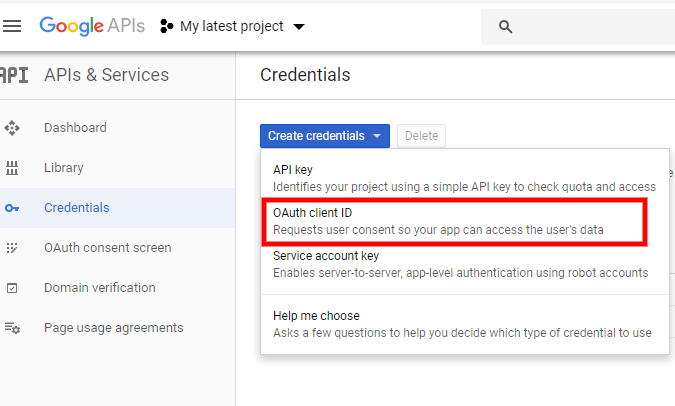
Review everything and make any necessary edits. If everything looks good, click on “Credentials” in the left-hand menu.
![]() Creating Credentials
Creating Credentials
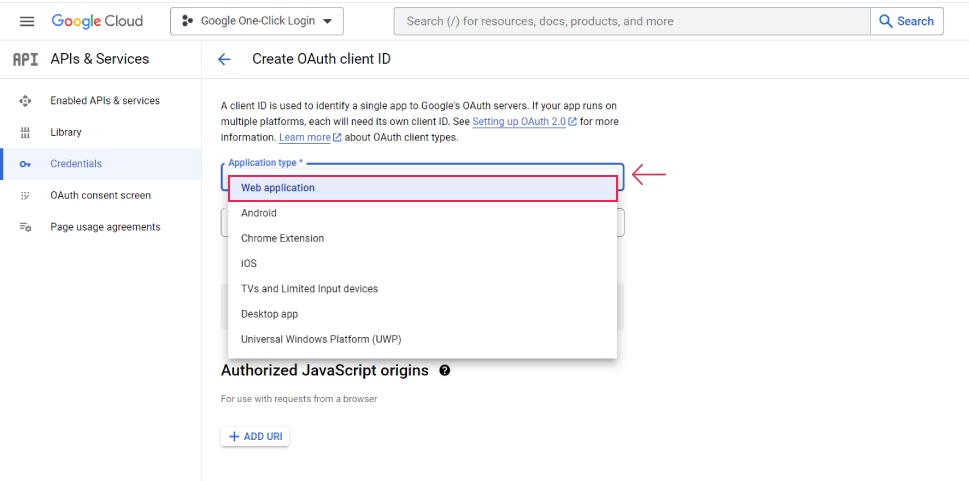
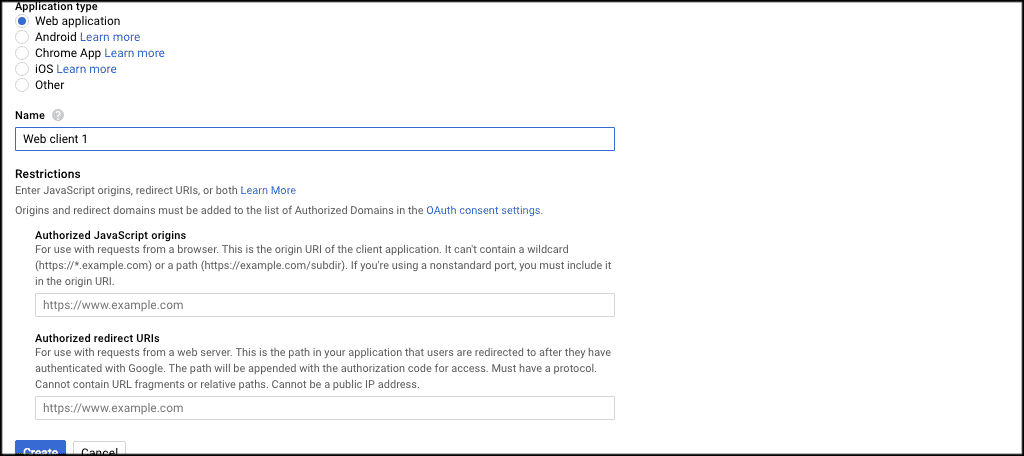
Here, click on “+ Create Credentials” at the top and select “OAuth Client ID.”
Open the Application Type menu and choose “Web application.“
Now scroll down to “Authorized redirect URIs” and click on “+ Add URI.”
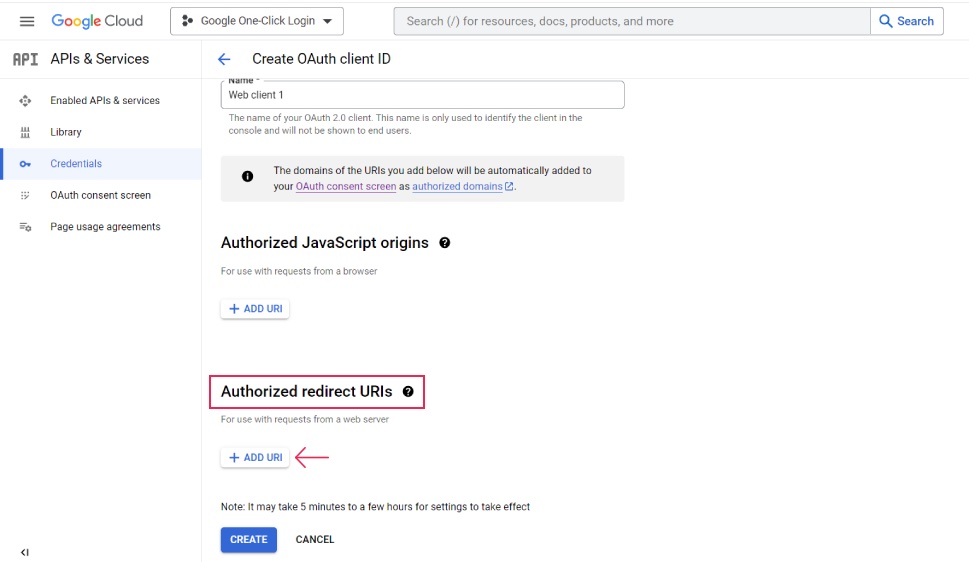
![]() Adding the Redirect URI
Adding the Redirect URI
This part is important: enter the following URI:
http://example.com/wp-login.php?loginSocial=google
Just make sure to replace “example.com” with your own domain name!
Finally, scroll down and click “Create.“
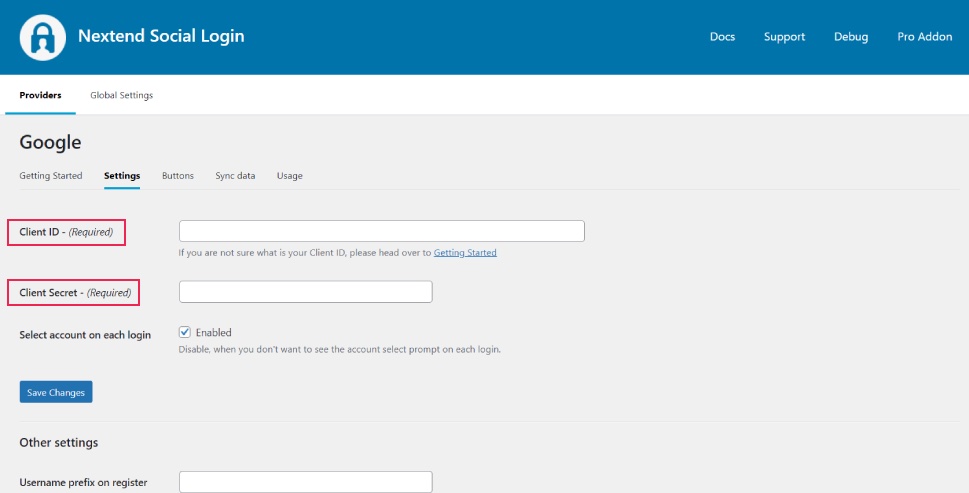
You’ll see a popup with your Client ID and Client secret keys.
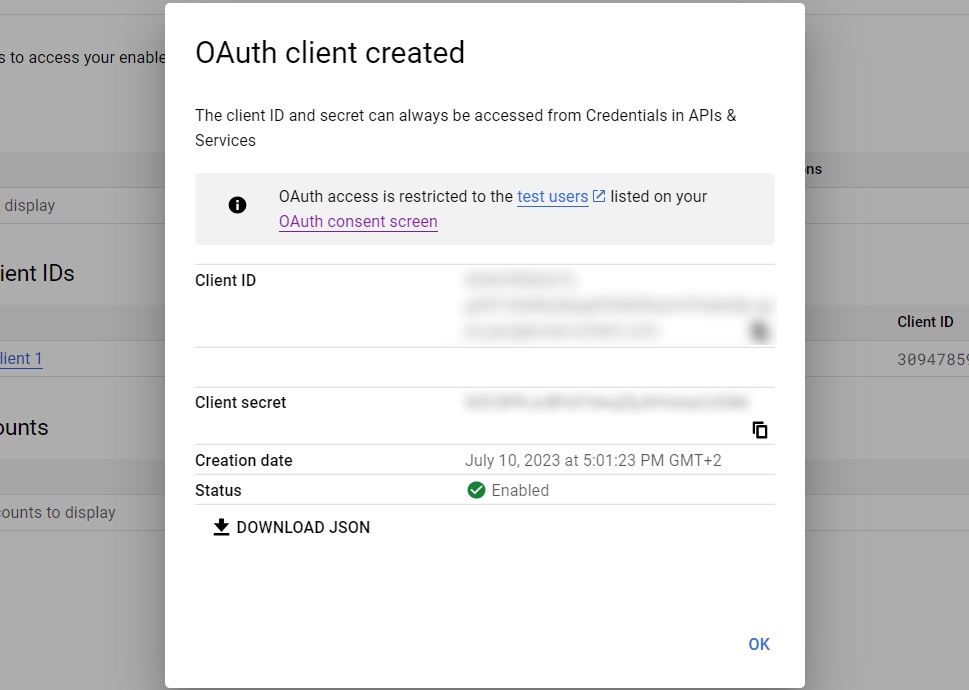
You need these keys to connect the app with your website.
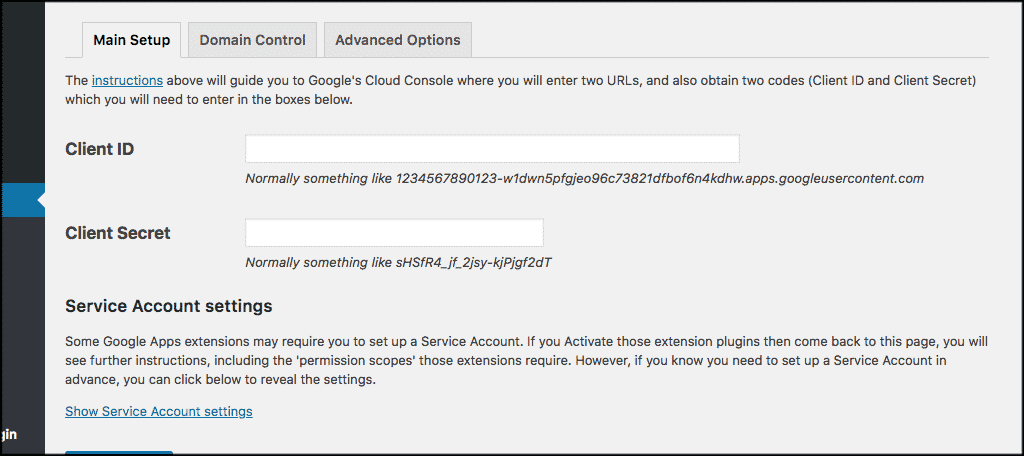
Go back to your WordPress admin where you left off. Scroll down and click the button that says “I am done setting up my Google App.“
![]() Finalizing Google Login Settings
Finalizing Google Login Settings
Now paste your Client ID and Client Secret keys. Choose whether you want to enable or disable the account selection prompt for each login. Once you’re done, click “Save Changes.“
After that, you’ll be asked to verify your settings.
If everything is okay, click “Enable.” You should receive a message from Google saying “Works Fine – Enabled.” If not, you can re-check the settings.
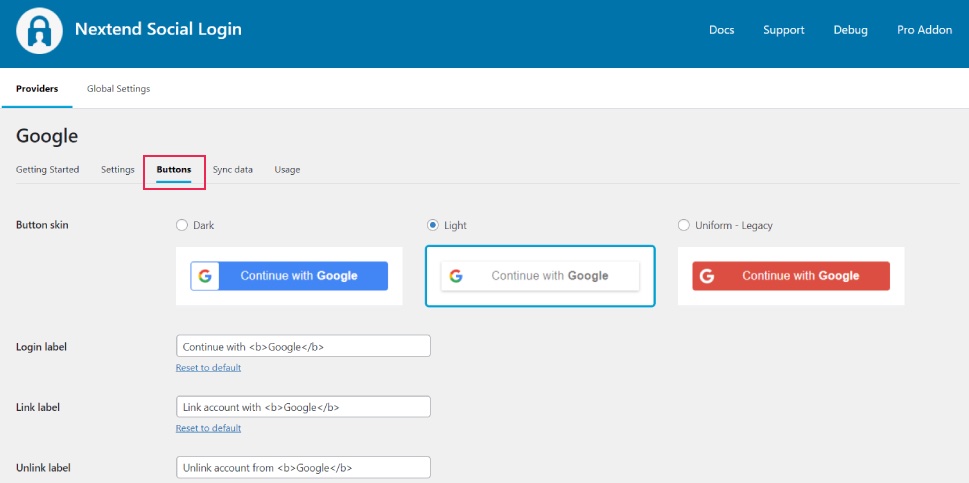
Now that you’ve set up and connected the app, you can customize how your login prompt looks. Click on “Buttons” in the menu.
Here, you can choose the button style—options include Dark, Light, and Legacy. You can also set the login label and link label.
![]() Saving Button Changes
Saving Button Changes
Click “Save Changes” when you finish customizing.
Finally, to take your app out of test mode, go back to Google Cloud and disable the popup with the keys.
Click on “OAuth Consent Screen” in the left-hand menu. Find the button that says “Publish App,” click it, and then confirm when asked to push to production.
You should see a status that says “Verification not required.”
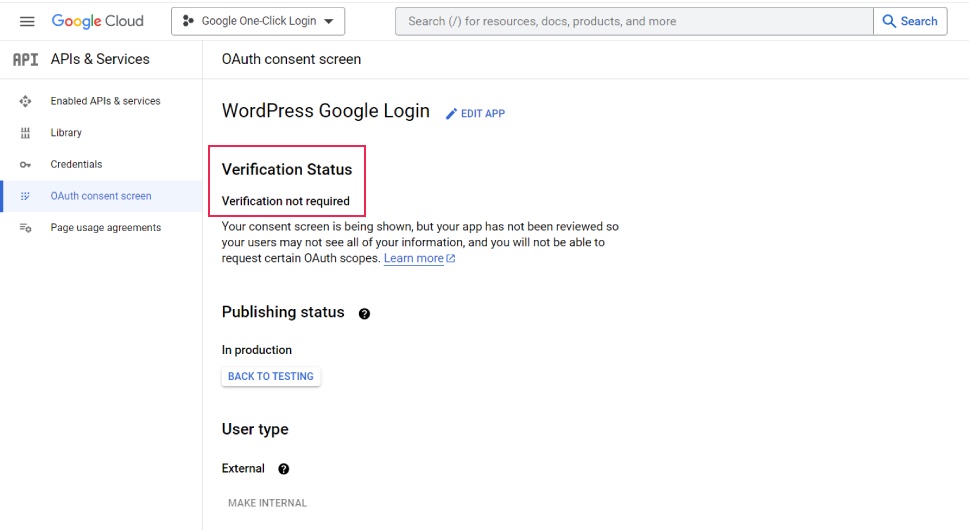
This means everything is set up correctly, and your users can now log in with their Google accounts.

How to Add Google One-Click Login with Google Apps Login (Method 2)
Here’s how to add Google One-Click Login to your WordPress website using the Google Apps Login plugin:
Step 1: Install and Activate the Plugin
First, you’ll need to install the Google Apps Login plugin on your WordPress site. Once it’s installed, go ahead and activate it.
Step 2: Go to Google Apps Login Settings
After activation, navigate to the WordPress dashboard. On the left side menu, you’ll now see a new option called “Google Apps Login Page” under Settings. Click on it.
Here, you’ll be asked to add a Client ID and a Client Secret Code.

Step 3: Get Google Developer Information
To get the required information, visit the Google Developer Console. If you’re already logged in, you’ll be directed to the console. Otherwise, log in with your Google account.
Step 4: Start a New Project
In the Google Developer Console, click on Start a project from the top menu, then click on New Project to continue.
Fill in your project name and, if necessary, your organization’s name. Then, click Create.
Step 5: Set Up OAuth Consent Screen
After creating your project, go to the OAuth consent screen. Here, enter the required email information, including your project’s email address and website URL, then click Save.
Step 6: Create OAuth Client ID
Next, go to the Credentials page and click on Create Credentials. Choose OAuth Client ID.
For the application type, select Web application. Then, in the Authorized JavaScript origins field, enter your website URL (e.g., www.example.com). In the Authorized redirect URLs field, enter your WordPress login page URL (e.g., https://www.example.com/wp-login.php). Once done, click Create.
Step 7: Add Client ID and Client Secret to WordPress
A pop-up will appear with your Client ID and Client Secret. Copy these keys and paste them into the corresponding fields on your WordPress plugin settings page.
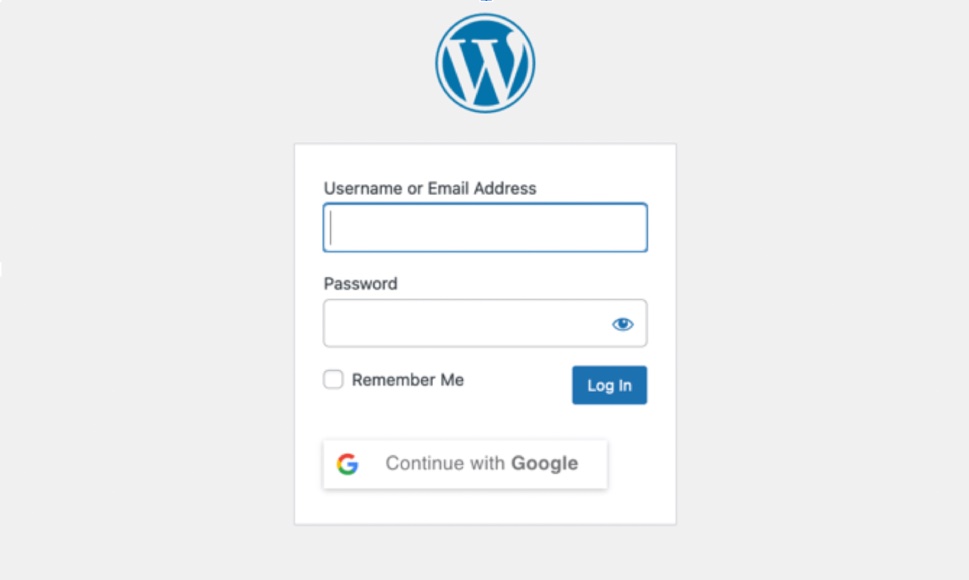
Step 8: Test Your Google One-Click Login
Now that everything is set up, log out of your WordPress site. Go back to the login page, and you should see a Google login button. Users can now log in with a single click using their Google account.
And that’s it! You’ve successfully added Google One-Click Login to your WordPress website.